Hello friends and welcome Crescendoh readers! So excited to have the opportunity to be Crescendoh’s blog curator this week.
Just stopping in for a quick tutorial to share ideas and techniques to embellish your photos/photo collages and re-size/save for blog/facebook/flickr/etc. posting.

On occasion you may have a desire to accentuate a favorite image with a touch of artistic flair or creative enhancements. Maybe you want to showcase a collage of photos in a non-traditional way, yet keep the focus on the images and not the scrapbook art.
Some creative ideas on embellishing your blog photos/photo collages:
- Use tape, stitching, or staples to attach your photo(s) on the blog or other sharing site michelle shefveland. supplies: Scrap.Frames 3

- Use our Scrap.Frame clusters, which are already embellished and include lifted drop shadows michelle shefveland. supplies: Scrap.Frames1, Miracle of Birth Pak

- Transform a special image using our Nature’s Sketchbook Photo Art Blends or Naturals Paper Textures, giving a textured, painterly effect (also used in the first two images of this post). Play with layer blend modes for varied effects. michelle shefveland. supplies: Naturals 7 Papers

- Add a flower, photo corner, or other accent michelle shefveland. supplies: Winged Hope Pak

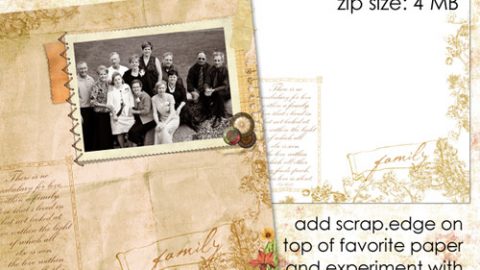
- Add a Scrap.Edge (tutorial here)

- Add a quote or bit of journaling michelle shefveland. supplies: Butterfly Wings 2 Pak


Here’s how to create your enhanced photos and get them optimized for web posting (in Photoshop Elements):
- Open photo(s)
- If using one photo, choose how you’d like to embellish it. Open embellishments. Drag and drop embellishments on image; position. Add shadows, if desired.
- Create textured Photo Art Blend, if desired. Tutorials are included with our Photo Art Blends.
- If using more than one photo, a fun option is to use a Scrap.Frame Photo Cluster. Drag photos onto Scrap.Frame, re-size and position as needed. Make Scrap.Frame top layer in layer palette.
- Save as layered PSD file to enable editing in future.
- Merge all layers (Layer>Merge Visible)
- Select collage by pressing Ctrl key while clicking on merged layer’s thumbnail in layer palette. Dancing ants should appear around collage.

- Crop image to size of selection (Image>Crop)

- Resize for web display (Image>Resize) and in dialog box choose 500 or 600 pixels as widest dimension.

- Save for web display (File>Save for Web) and in dialog choose about 60-70 JPG quality.

- Insert this optimized image into your blog on upload to Facebook/Flickr/etc.


These are just a few of the endless opportunities to enhance your photos with a creative twist for blogs, Facebook, Flickr, and other sharing communities.
Happy Creating! Michelle