How about another quick how-to?! When I was creating this page with our new papers and Click.Masks, I wanted a speedy, yet creative title. Hmmm…a ‘die-cut’ chunky title cut out of the paper with an off-set border sounded fun (and cheaper than the paper cut replica!)
Here’s how in Photoshop Elements. Photoshop and Paint Shop Pro would be almost identical.
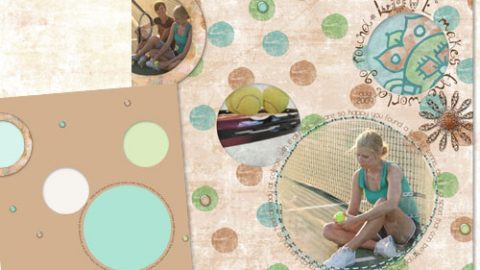
fyi…yes, as the layout shows I just got a Lensbaby 3G Control Freak lens. You can see some of my first captures on my photography site here. Too fun!
- Open Photoshop Elements
- Open paper
- Open Click.Masks 2
- Open photos
- Drag photos and Click.Masks onto paper
- Position photos above corresponding Click.Mask in layer palette.
- Choose Layer>Group with Previous (Ctrl-G or Cmd-G on a Mac) to clip photo to mask.
- Repeat step 7 for each photo. Image below shows layer palette of photos and Click.Masks.

- Add desired elements
- Select Type Tool.
- Choose chunky font for fun title. I used MTF Pork Chop.
- Set type color to accent paper. I used color picker to pick up a green in the photos.
- Type title in desired location on page.

- Select title layer in layer palette. Select title shape by pressing Ctrl-Click (Cmd-Click on Mac) on type thumbnail in layer palette. Should have dancing ants around the title shape.

- Select paper layer in layer palette. Copy/Paste the shape selection with Ctrl-J shortcut (Cmd-J on a Mac).

- Select the new die-cut title layer right above the paper.

- Move die-cut shape to top layer by pressing Layer>Arrange>Bring to Front (Shift-Ctrl-J, Shift-Cmd-J on a Mac).

- Using arrow keys move this layer a tad to the left and top.
- Done!


Keep learning! Michelle