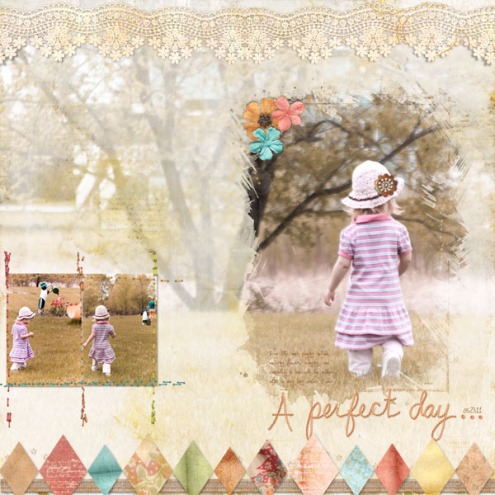
michelle shefveland. mom’s cupboard scrap.clusters, nature’s sketchbook elements 1 (lace), click.masks 7, stitchies 6 and stitchies 7
We’ve received quite a few inquiries of late regarding layouts in our gallery with full-page photo blending accompanied with click.masks. So time for another how-to using Photoshop Elements and the layout above (Photoshop follows similar steps). You can see Part 1 of this series here.
- Open Adobe Photoshop Elements
- Open Paper of choice to blend image into. We chose a paint stroke collage paper from Art Journal Fresco Papers.
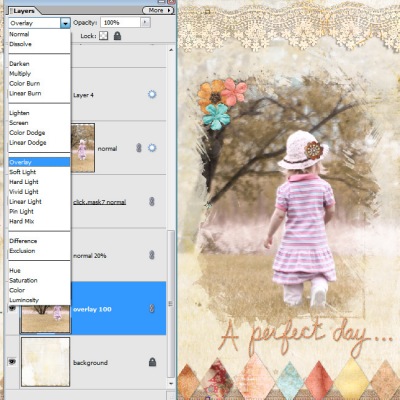
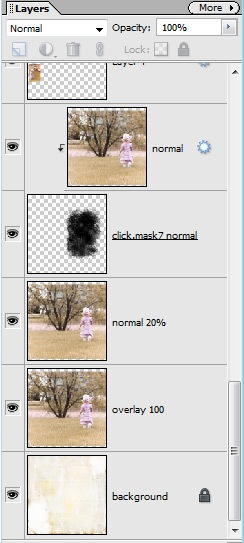
- Add three layers of the main focal photo sized to fill the page.
- Set the bottom layer’s blend mode to Overlay at 100%, the next layer keep Normal and adjust the opacity to your taste (I used 20%), then clip the top layer to the click mask (positioned over the focal point of the image, like the little girl in mine).
That’s all there is to it!
Note: my camera is 17MP so the photos are sized 12×18 at 300 dpi. If your images are much smaller, consider replicating this at 8×8 instead of 12×12.
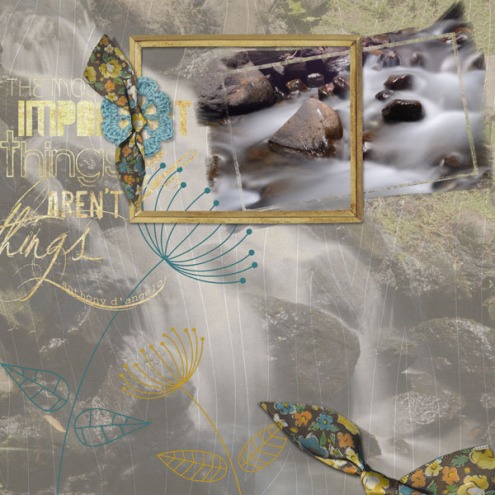
Marie shares her blended page of beautiful river rock imagery below.
And, check out our new products in the shop, 20% Off thru Saturday, June 11th.
Happy creating! Michelle
marie di raimondo. my week pak, click.masks 12, this is life 2 scrap.words

