|
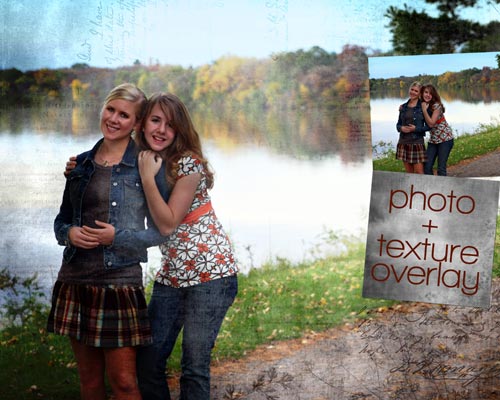
Textured Photo Blends
Textured photo
blends are probably the hottest trend in professional photography.
And...so, so easy with our Naturals paper series. Follow these simple
steps with your image editor (one that has layer blend modes - Photoshop,
Photoshop Elements, Paint Shop Pro):
-
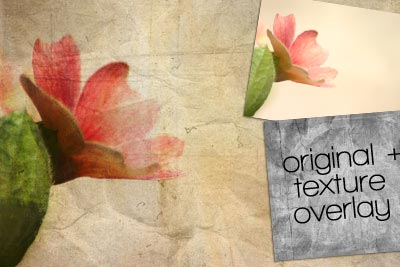
Open photo
-
Open paper
-
Drag paper on top of photo layer.
-
Adjust layer blend mode of paper to get
desired effect. With our Naturals 7 Papers, Overlay usually is my favorite
to give a pop in color and texture.
-
Select soft eraser brush at about 30% percent
opacity and gently erase paper texture over skin or other areas you don't
want texture.
We also offer a
Limited Professional Use License for
photographers to use our products in their business. Simply purchase one
license for each
download or
CD
(must purchase CD license, not download license, for
CDs). Note that this license is not available for digital designers
to use our products in their designs.
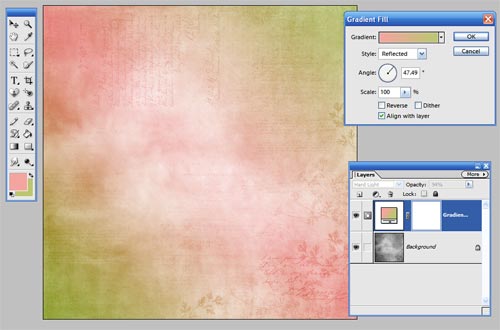
Custom Papers
Our new Naturals 7 Paper Pak has a unique feature in that the papers are
desaturated (two have a hint of color), making them great for texture
photo blends, but also for adding your own color to make one-of-a-kind
papers. At right I added a custom gradient overlay for a painterly effect.
Here's how:
|
Textured Photo
Blend Samples
 |
-
Open paper
-
Select two complementary colors for foreground
and background color swatches (or use color picker to choose two colors
from your photo).
-
In layer palette, click on Create Adjustment
Layer icon (black/white circle) and select Gradient.
-
Choose Gradient type by clicking drop down
arrow in Gradient Fill dialog, select Style (I chose Reflected), and angle
(I chose 47). Click OK when you like the effect. A gradient fill will now
cover your texture paper.
-
Adjust layer blend mode of paper (in layer
palette) to get desired effect. For the paper at right, I chose Hard Light
and adjusted Opacity to 94%.
-
Experiment and have a blast creating 1000's of
papers unique to you! Solid color fills are nice, too, or play around with
all of the preset gradients included with your image editor.
Michelle Shefveland, Copyright 2008, All
Rights Reserved

Supplies:
Naturals 7 Paper Pak,
Embroidery AlphaSet,
Scrap.Frames 2,
Butterfly Wings 2 Page Pak,
Artistic Templates - Devotion
|
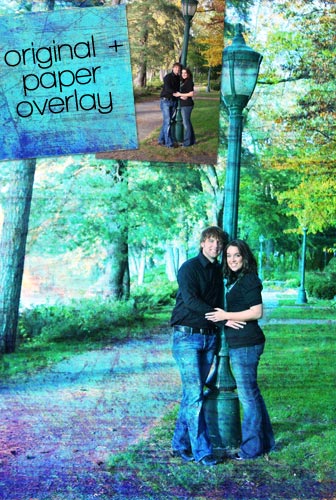
Custom Paper Sample
All
samples above use papers from our
Naturals 7 Paper Pak.
Use our Naturals paper series in your photo texture
work, or in creating one-of-a-kind papers!
Our
Naturals Paper Series


Other Sample using Naturals 5
Paper Pak
|