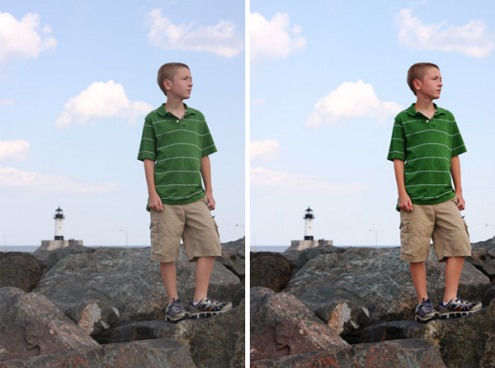
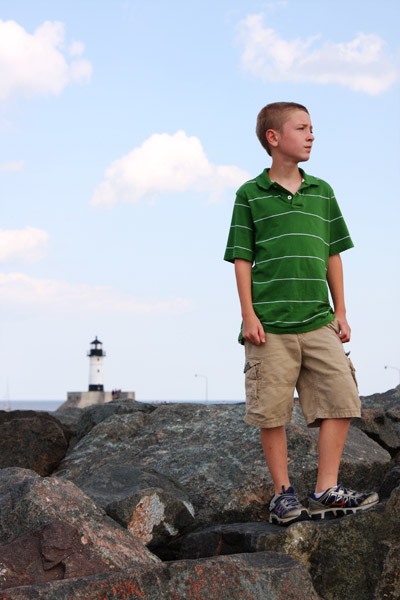
Time for a quick tutorial to add a bit of zing to your images…totally suited for beginners, and best with photos having good focus, correct color balance, and exposure.
The following are steps for either Adobe Photoshop or Photoshop Elements:
- Open image.
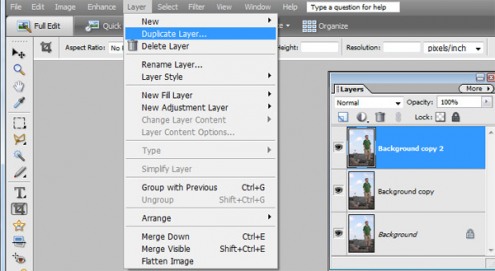
- Make 2 duplicate layers of original background image (Layer>Duplicate)
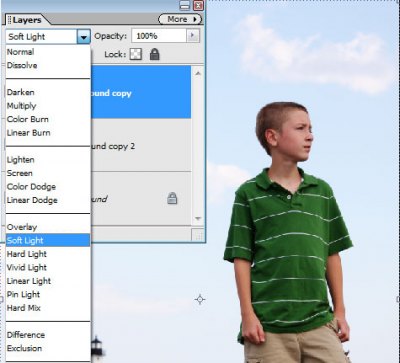
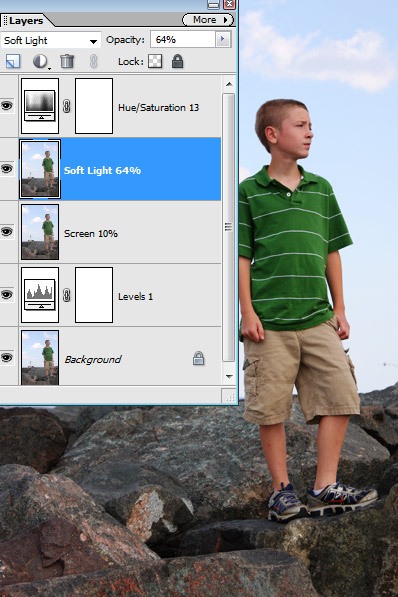
- In Layer Palette, set top layer to Soft Light Blend Mode…adjust to about 60% Opacity
- In Layer Palette, set middle layer to Screen Blend Mode…adjust to about 10% Opacity
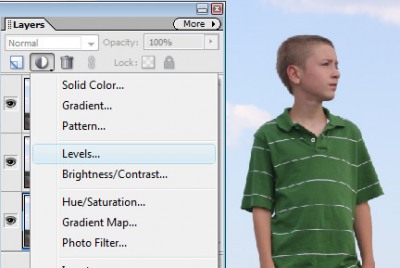
- Adjust Levels of original image layer (Background layer). I recommend using an Adjustment Layer so it is non-destructive and can be adjusted later.
- Click Background layer in Layer Palette.
- Click the Black/White circle icon in Layer Palette (top of Layer Palette for PSE, bottom for Photoshop), then select Levels.
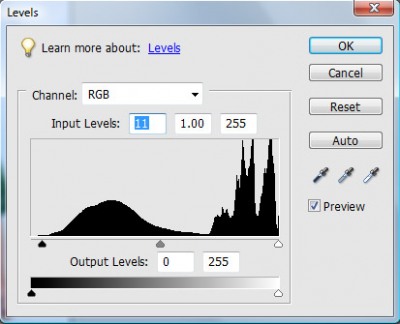
- Set the shadow and highlight values by dragging the black and white Input Levels sliders (the left and right sliders directly under the histogram) to the edge of the first group of pixels on either end of the histogram. You can also enter values directly into the first and third Input Levels text boxes.
- In my image, I moved the shadow input slider to the right to meet up with the left edge of the histogram as shown.
- Adjust any of the three topmost layer’s opacity until pleased with the result.
- Add a bit more pop by increasing the saturation a touch (about 10). Press Ctrl-U (Cmd-U for Mac) to open Hue/Saturation Dialog. Move Saturation slider to the right a small amount. Here’s how my layer palette looks when I’m done.
- You may also add a bit of sharpening with the Unsharp Mask. There are many different options for this function, and it is recommended to do as a final step. I didn’t add any sharpening to the image shown. For those who prefer using Photoshop Actions, my $1 Digital Darkroom Action applies a variation of these techniques, plus sharpening/level adjustments, and works with Adobe Photoshop CS and above. All layers are kept intact, as well, so you can make adjustments to each.
- Save final image to new name at highest quality JPG or other preferred format.
Keep learning! Michelle

