Can you smell that? I think it’s finally spring! Seriously this has been the longest winter of my entire life. Now that we can be sure there will be no more freezing nights, we can get the garden started! Super excited about planting some flowers and veggies this year. We expanded our garden and spent the whole weekend digging. It’s a glorious thing to feel the sun on your back and dirt under your nails when it’s been over 6 months of bitter cold temperatures and unending piles of snow.

My favorite type of plant, and I think I’m not alone here, is the succulent. Any variety. The past few years we have collected a variety of pots (some meant for plants, and others not so much: AKA tea cups & mason jars) from garage sales, thrift stores, and just looking through our cupboards. Mom and I love creating little collections of succulent plants and bringing color to nearly every room in the house. We’ve also been having fun taking photos of our arrangements and posting them on Instagram. They’re adorable, right? So this week’s new products in the shop reflect a flowery, springtime, botanical feel. Now go take some pictures of those gorgeous flowers that I know you have blooming, and scrap ’em! 🙂

One of my favorite products lately has been our Stitched Botanicals Papers. We’ve got 3 sets of them, each is a really cool different color palette. But the best part is that you can use them without frames or click.masks, or anything really. I’ll show you a super quick tip on how to use the stitching as borders or “frames” for your photographs.
The following steps are done using Photoshop (Photoshop Elements follows similar steps):
1. Open one of the Stitched Botanical Papers, and some photos you want to use in your layout.
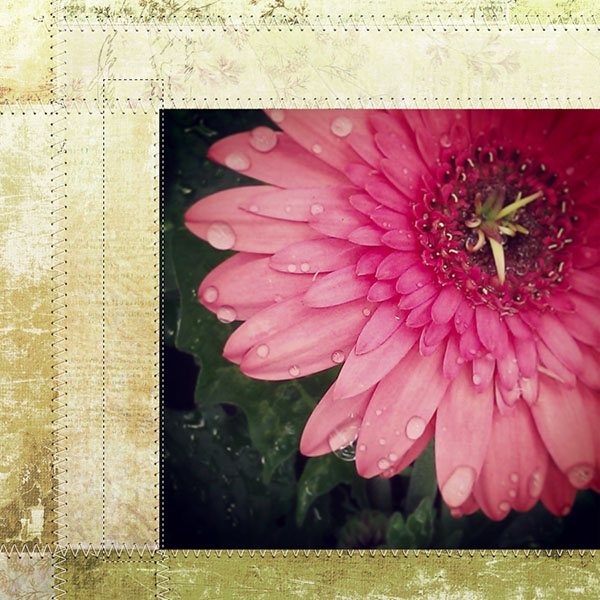
2. Drag one of the photos onto the paper and place it in one of the areas that is surrounded by stitching. It could be in the middle, or on the edge. Either way looks really cool.

3. If your photo doesn’t fit perfectly into the space, that’s OK! Just grab the handy Marquee tool (make sure it’s set to the rectangle shape) and click and drag the mouse to select the area you want to remove from the photo. Then click Edit>Cut (Control-X on PC; Command-X on Mac) to trim it to the size/shape you want.
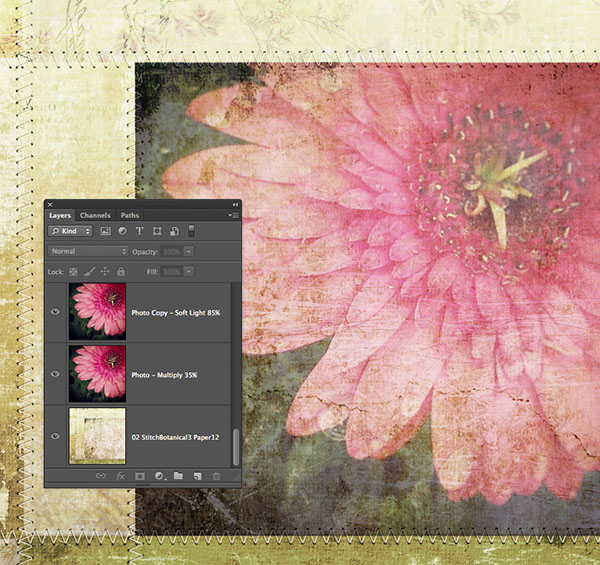
4. You can either stop here, or use blend modes to make it look like it’s a part of the paper and the stitching will even show through the photo! Just experiment to find one that works best, I find that layering the photo on top of itself and using more that one blend mode makes it even more integrated into the paper. On this image I used Multiply at 35% opacity on the bottom layer photo and Soft Light at 85% on the top layer.
5. Repeat the above steps to add more photos to the same layout if you want! And that’s it! Awesome & easy, right?
Here is the completed layout, and another using the same technique (both include the new products in the shop):


SAVE up to 40%!! Here are this week’s six new products, on sale through Wednesday, May 15, 2014 (plus all Page Paks on sale – newsletter goes out Tuesday morning with details).


Have an awesome week and enjoy the weather people! – Rachel
Need any garden inspiration? Then just check out what all those creative folks using Pinterest are up to; plus we’ve got a great collection going on our Green Thumb Dreams board.