Also
Featuring Changing Colors of Individual Layers
Below is a quick tutorial on how to create a
simple, digital scrapbook layout using one of the our Simply Digital CDs
layout templates with Paint Shop Pro 8 (PSP). The templates already
have the background paper created, as well as photo mats and
embellishments to help you create beautiful layouts in little time.
After completing the exercise, you should be
able to:
1.
Create a scrapbook layout using PSP with the help of a layout
template!
2.
Add photos
3.
Move and Resize photos
4.
Rename layers in Layer Palette
5.
Make unwanted layers invisible (rather than deleting them, so
you can use them at a later date)
6.
Change colors of paper and embellishments to customize layout
to match your photos
7.
Add drop shadows that were removed when the .psd file was
loaded into PSP
8.
Duplicate layers
9.
Add text
10.
Save layout for printing or for web display
OPEN PAINT SHOP PRO AND TEMPLATE:
·
Insert our Simply Elegant CD Volume 1
Version 1 in CD drive. Note: this CD has since been replaced with
Version 2. A similar
layout template, Simple Things, has a quilt background with different
word art and elements. However, you should be able to follow
along with any template of ours.
·
Open Paint Shop Pro 8
·
Clicking on the top menu, select File/Open
and open “Old Quilts” from your CD drive in the 8.5 x 11 Layouts folder.
·
Save File: It’s now a good idea to save the file
on your hard drive as a .pspimage or .psd file to retain the layers.
ADD PHOTOS:
·
Let’s add some photos from your file system to the
layout so it can start to look like YOUR creation!
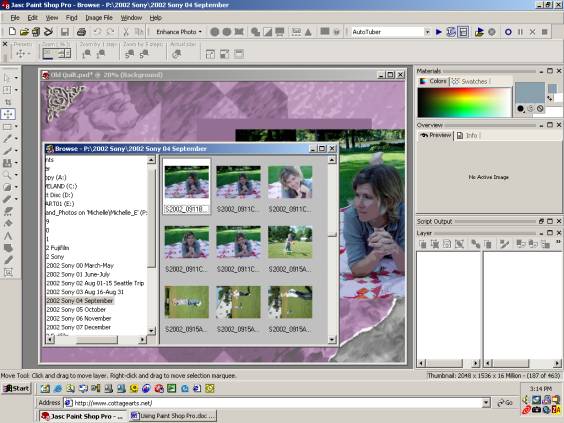
·
Click on the menu File/Browse and browse your system
for a particular photo or photos you would like to add. A browse
window will appear with thumbnails of your photos.
·
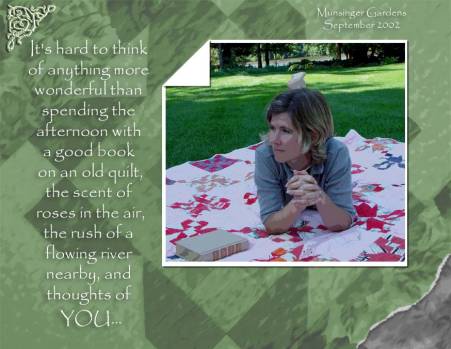
Click and drag photos from the browse window onto
layout, as shown below. As the background is of a quilt, I thought a
fun layout would be to use a photo from a picnic last fall where we
used an old quilt. The photo was taken using the solarize setting
with a Sony Cybershot digital camera, giving a softer finish, almost
like a painting.
·
The photo layer came into the layout below the photo
mat, so move it upward in the Layer Palette by clicking and dragging
on the photo layer until it is above the photo mat layer.
·
Now, using the Move Tool on the left toolbar (see above
for the fourth icon highlighted blue), move the photo to desired
position.
·
Resize photo and photo mat using Deform tool,
positioning pointer in one of the corners and dragging inward to
decrease size proportionately.
·
Cut portion of photo off of side to make it more square
in shape. To do this make the photo the active layer in layer
palette, select the "Selection tool" on the tool bar, draw rectangle
over portion of photo you want to "cut", then select Edit/Cut on top
menu.
·
Rename photo (named “Background” by PSP) by right
clicking on the layer and selecting Rename command.
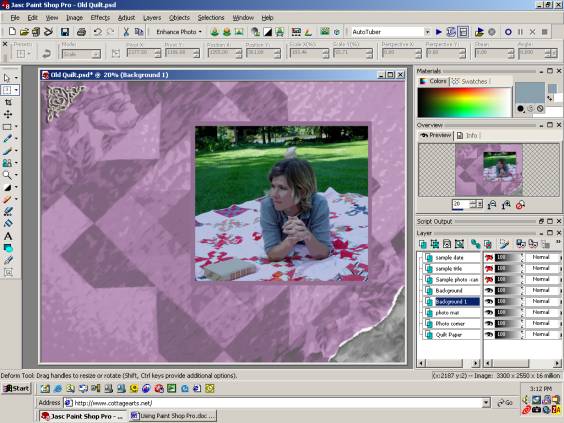
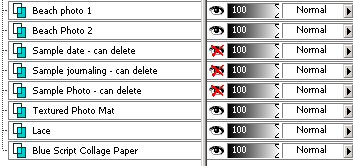
MAKE LAYERS INVISIBLE:
Make sample photo (if present
- not on new versions of CDs), date, and journaling layers
invisible by clicking on eye image in the Layer Palette to the right
of each of these layers. See red X through eyes below. This is a
great feature to use when you want to test different photos or colors
on a layout
APPLY DROP SHADOWS:
·
Select a layer that needs drop shadows to be applied.
In this layout, they are the Journaling tag, Photos, Textured Photo
Mat, Lace, and Leaf.
·
To add drop shadows, click on Effects/3-D Effects/Drop
Shadow. The following options will appear:
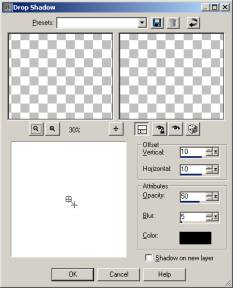
You can adjust the offset, opacity, blur and
color of the drop shadow, so now is the time to play around and come
up with your own look! In this example, the factory default was used.
FUN EFFECTS:
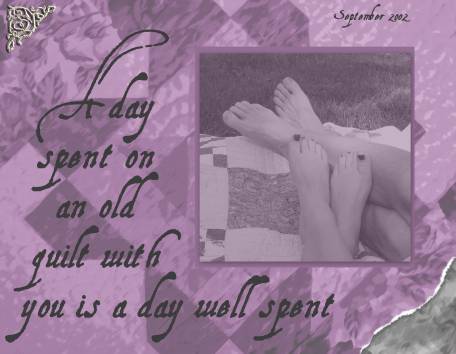
Change colors of paper and embellishments to
coordinate with photos:
·
In the sample layout, the photo clashes with the plum
background, so let’s change that!
·
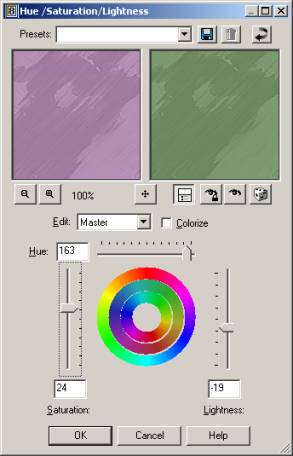
There are many ways using PSP to change colors, one of
which is changing the Hue/Saturation.
·
To do this, click on the menu Adjust / Hue and
Saturation / Hue/Saturation/Lightness, or simply press Shift +H (this
command might take a bit to open the dialog box below).
·
See the settings below for Hue, Saturation, and
Lightness to create a green to coordinate with grass.
·
Click OK and the layer selected will change to the new
color.
·
Repeat for any layer you wish. In this example, the
photo corner and photo mat colors were also changed using this method.
Adding a folded corner tab on the photo mat:
·
Activate photo mat layer. Using Freeform
Select Tool
with the point to point option in the menu bar, draw a triangle on the
upper left corner of mat to cut off.
·
Select Edit/Cut and then Edit/Paste to paste the cut
off triangle on the layout.
·
Rotate the new triangle 180 degrees, using Image Rotate
Freeform 180 degrees (for the individual layer).
·
Cut the same portion of the photo off by repeating the
first step.
·
Position new triangle on upper left corner of mat.
·
Add drop shadow to triangle and you have a neat effect!
ADD TEXT:
·
Select Text Tool (A) from the Tools toolbar on the left
side of screen.
·
Select font, point size, width and other options on the
top menu bar.
·
Select text color in foreground color box of Materials
Palette. You can use the Color Picker to click on area of layout to
replicate same color (in this case, the photo mat).
·
Click on area of layout where you want to start entering
text and the Text Entry box will appear.
·
Just enter your text and click on Apply when complete.
Rename this layer in the Layer Palette (right click on the layer) to
something more explanatory, such as “Journaling text”.
·
Add another text layer for the top right text. Repeat
above steps.
·
Add drop shadow to text layers, if desired, as in this
example.

Congratulations! You did it!
SAVE FILE FOR PRINTING AND/OR WEB DISPLAY:
·
Save final image to same filename as in beginning of
tutorial. You can print directly from this file for high resolution.
·
If burning to CD, save as full-size .jpg, .tif,
or .pdf.
·
For posting to Internet sites or e-mailing to family and
friends, also save to different name at 72 dpi, 500 pixels wide, .jpg
format, keeping file size less than 100KB.
Michelle Shefveland,
CottageArts.net, Copyright 2003, All Rights Reserved |