
|
|
Adding
Water Drops to your Photos
using Adobe Photoshop
(Corel® Paint Shop® Pro, Adobe® Photoshop®
Elements, Corel® PHOTO-PAINT,
Ulead PhotoImpact 7 and higher, and Microsoft® Picture It!® Digital Image
Pro would follow similar instructions)
|
A Tutorial For A Rainy Day: Creating Water Drops On Your Photos
Begin by opening a new workspace; I used a 5"x7" at 300 dpi. Start by using the ellipse tool and draw a circle shape in black, then right click to > 'Rasterize Layer'. Select the elliptical marquee tool, set 'Feather' to 10 px, and draw a smaller circle selection that sits close to the edge on one side (Fig A).
|
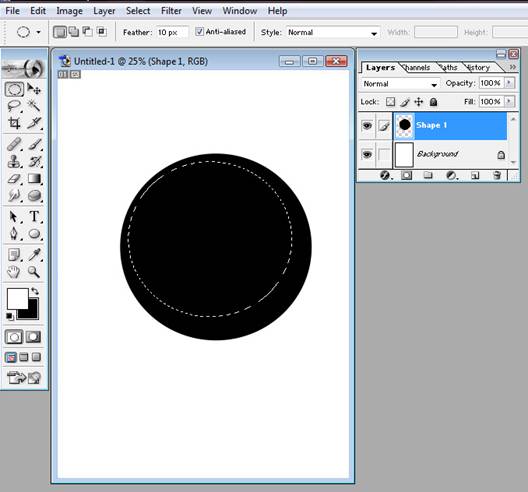 Fig A
|
|
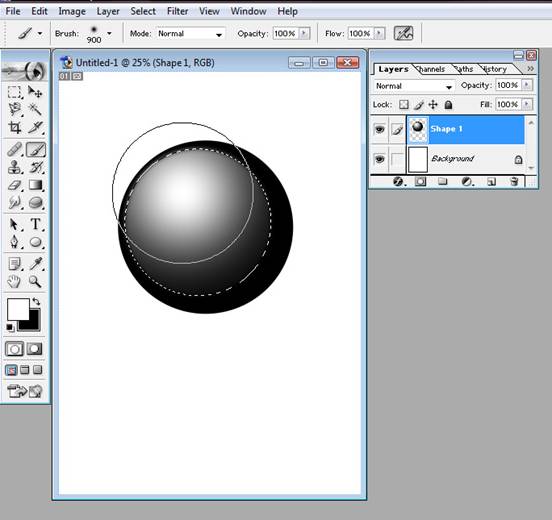
Now click on the white in the color palette, and select the brush tool in a large airbrush that almost fills the selection (I chose 900). Start outside the top left of the selection and click once to get the nice shine you see in (Fig B). Then click once more to the upper right and once to the lower left to get a nice effect. Go to 'Select > Deselect'.
|
Fig B
|
|
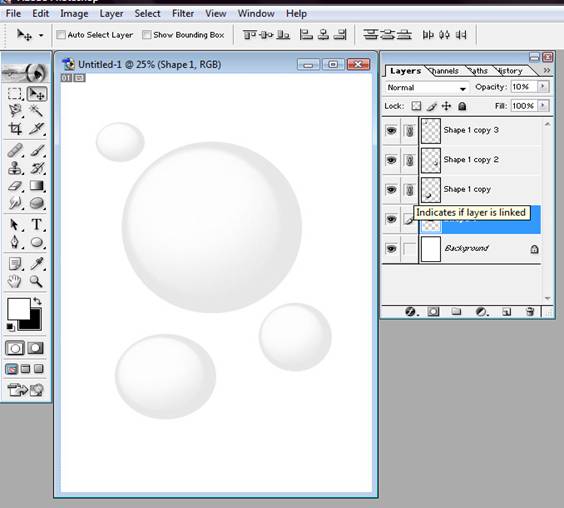
Next go to 'Filter > Noise > Add Noise'. Check the box for monochromatic, and select a uniform amount of 30 and hit OK. Then, under 'Blending Options' > General Blending, change the opacity to 10% and click OK.
Now just duplicate that layer and resize to make smaller drops around the main one. You can rotate or distort them, and since not all raindrops look the same, you can't make a mistake. Have some fun with it! When you like what you see, click on each layer (except background) to link them together. When they are linked you will see a chain link appear next to the eye icon in your layers palette (Fig C). Go to 'Edit > Define Brush' and name it ‘Water Drops'. You just made your own custom brush! I made a few different shaped and sized brushes to work with, be sure to make as many as you like. Just remember to save your brush set in the preset manager or next time you open the program all your hard work will be gone!
|
Fig C
|
|
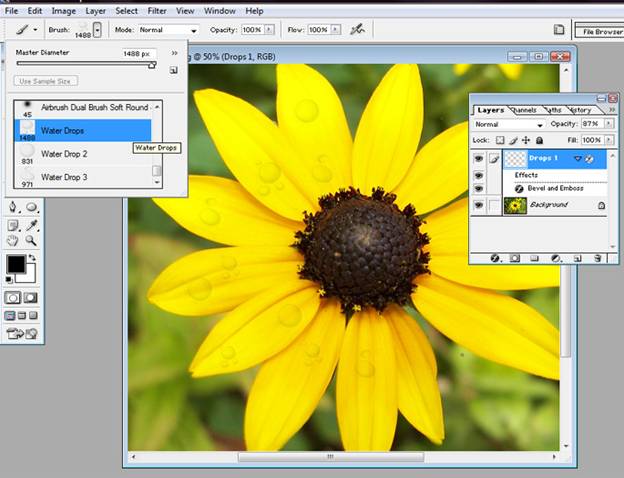
You are now ready to create your rain shower. Open your photo and create a new layer named 'Drops'. Select your new brush, which will now be found at the end of the list, and set to an appropriate size to paint onto your photo (Fig D). Vary the sizes and use a couple different brushes if you can to make it more convincing. When you are done you can either add more layers, rotate them, or play around with the blending options some more. Adding a small outer bevel can also complete the look.
|
Fig D
|
|
As soon as you are happy with the results, flatten the layers, admire your work, and scrap your photo!
|
 |
Written by Marie DiRaimondo, CottageArts, LLC, Copyright 2007, All Rights Reserved