
|
|
Re-sizing
12” x 12” Layout Templates to 8.5” x 11”
using
![]()
(Adobe® Photoshop® and Photoshop Elements,
Corel® PHOTO-PAINT,
Ulead PhotoImpact 7 and higher, and Microsoft® Picture It!® Digital Image
Pro would follow similar instructions
|
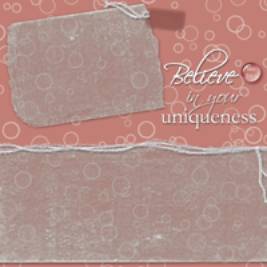
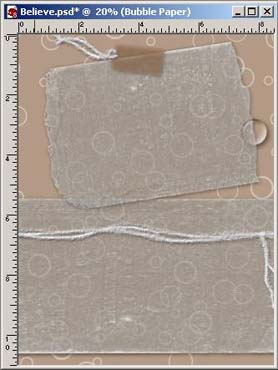
Have you ever found yourself wanting to use a specific layout from one of the Simply Digital CDs, but it’s in a different size format than what you need? I found myself in this situation the other night, while trying to make a layout with some pictures of Devin. I liked Believe from Simply Fun, but it was 12x12 and I wanted it in 8.5x11. So now, I’m going to show you how I solved my dilemma! It’s basically very simple to convert a 12x12 to 8.5x11 using Jasc Paint Shop Pro 8.1. I break it down into three steps:
|
|
|
What you’ll need:
|
|
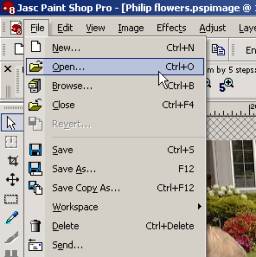
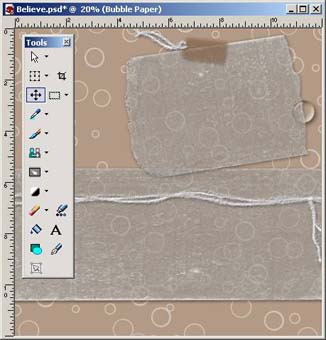
Open Paint Shop ProOpen Layout within Paint Shop Pro
(Note: I colorized the papers and elements to my liking at this time, but won’t go into that now. We have tutorials on our Tutorials page on this topic.)
|
|
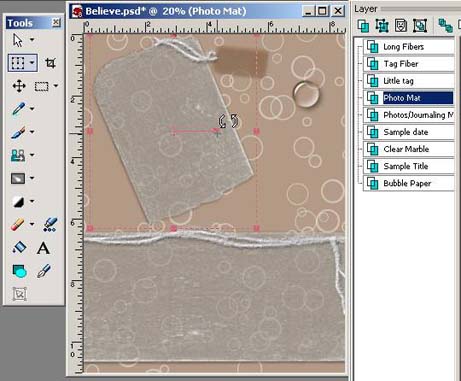
Move ElementsWith the layout template open, use the Move tool to move all the elements inward, so they fit within an 8.5x11 frame. (Note: if your ruler is in centimeters and you want it in inches, edit your user preferences by choosing File>User Preferences>General>Units> Inches) For my example, I only had to move the photo mat to the right a bit, and move the journaling mat upward to preserve the lower drop shadow. |
|
Crop Layout
|
|
|
Re-size
Elements Now we just need to correct the
proportions of the elements. They’re overwhelming the page at this
point. My tool of choice for this is the Deform tool on the Toolbar.
|
|
|
For this layout, I only needed to re-size the Photo Mat and lower Photo/Journaling Mat, as the tag, marble, and fibers look great.
|
|
|
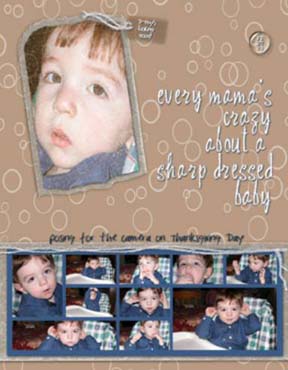
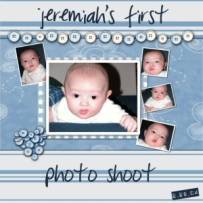
Finish Layout Now, I can get to the fun part of adding my photos, title art, and journaling to make it my own creation!
Save Layout You’re done! Save as a .pspimage file to retain layers (choose File > Save > File Type: >PSPIMAGE). Save as a .jpg to share on the Internet (resize to 72 dpi for this option).
Keep experimenting, as the more you play, the more you learn!
Supplies for Sharp Dressed Baby: Coming next month: Converting 8.5x11 layouts to 12x12!
|
|


Written by Leila Schweiss, Layouts by Leila Schweiss using the Simply Digital product line, Copyright 2004 CottageArts.net, All Rights Reserved.